投稿日:2023-10-09
【Grasshopper-Three.js】Grasshopperで作成したモデルのブラウザでの表示と更新
#Grasshopper
#Python
#Three.js
#R3F
今回は Grasshopper で生成したモデルをブラウザで表示し、Grasshopper での変更をリアルタイムでブラウザにも反映させていく方法について書いていきます。(※リアルタイムといってもブラウザのリロードは必要です。)
今回はローカルで行いますが、クラウドでも実装可能だと思うので、モデルの閲覧だけならブラウザでチーム共有するみたいなこともできるかと思います。
概要
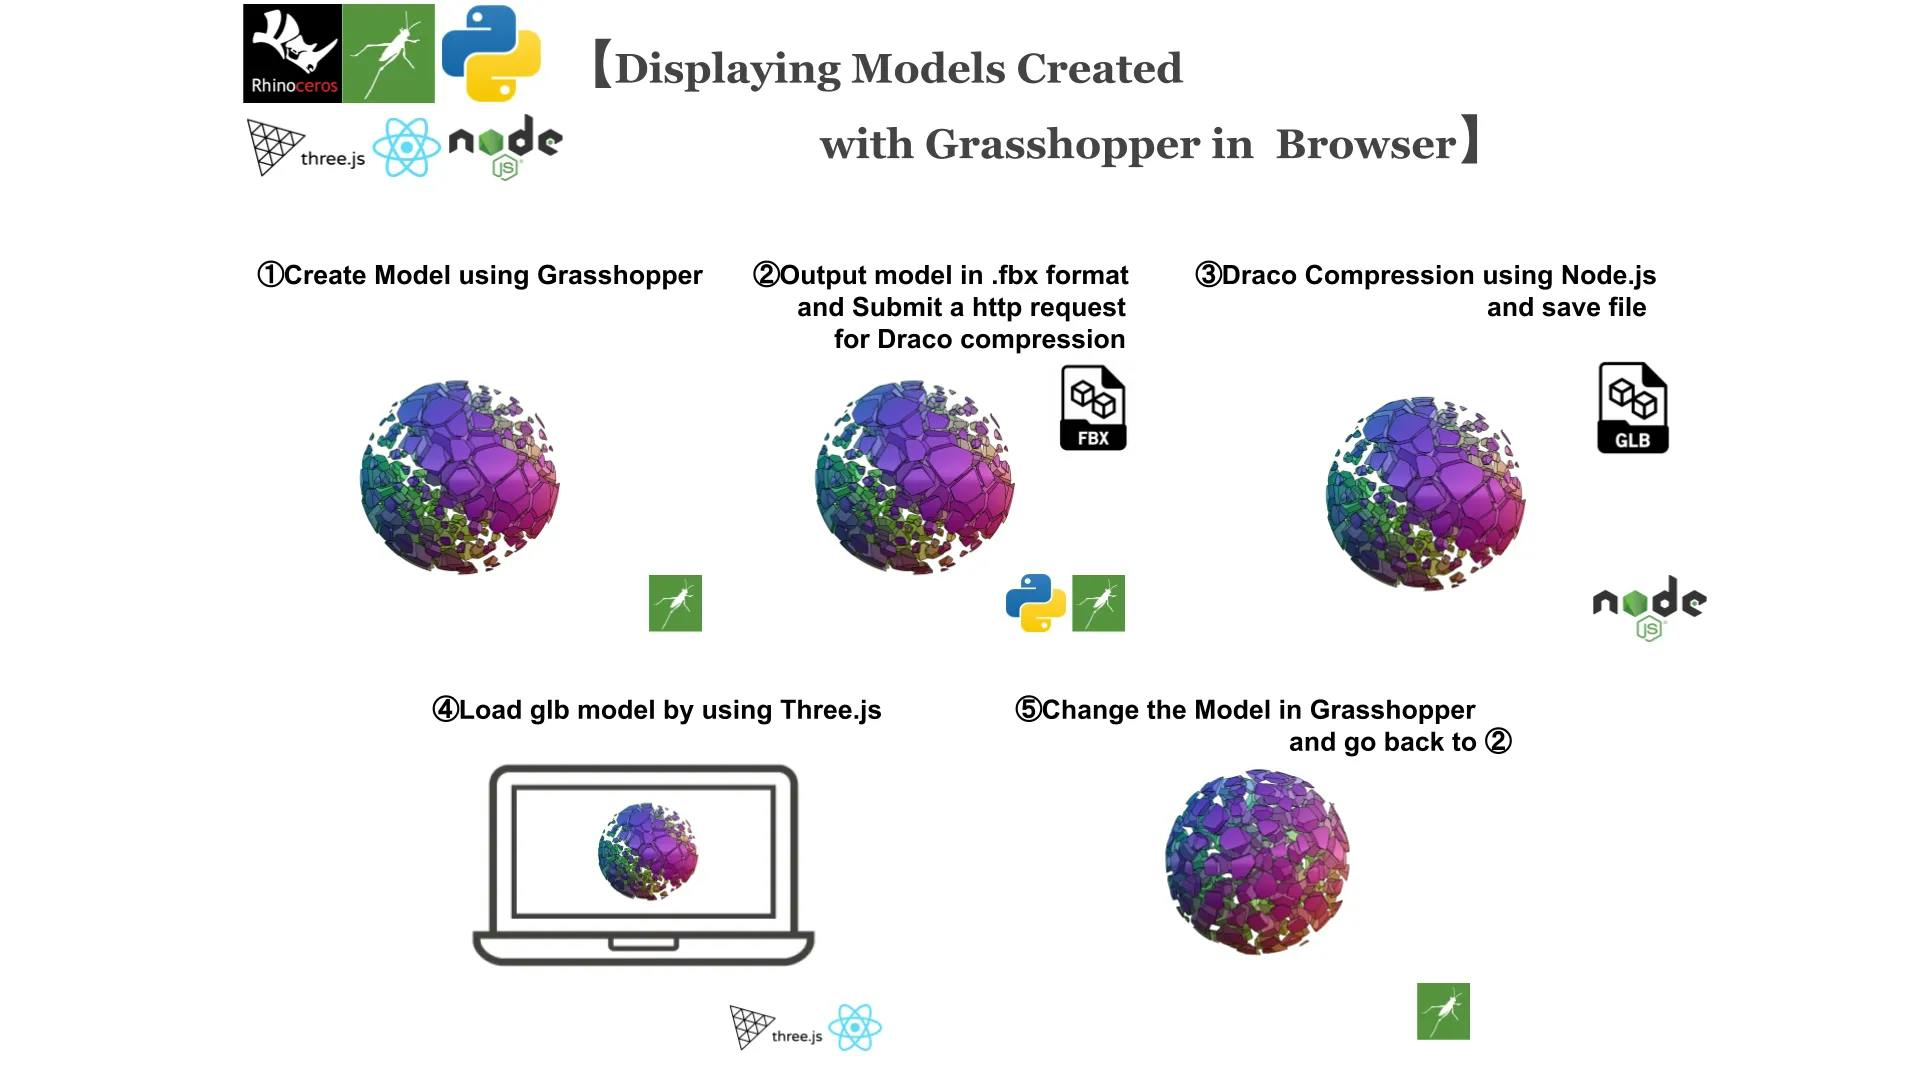
トップにある画像が全体の流れになります。
- step1: Grasshopper でモデルの作成
- step2: Ghpython コンポーネントを使用して、作成したモデルを fbx 形式で Export
- step3: Ghpython コンポーネントから Draco 圧縮を行うリクエストを投げます。
- step4: Node.js を使用して.fbx で出力したモデルを Draco 圧縮して gltf 形式で出力します。
- step5:Three.js を使用して Draco 圧縮をかけたモデルを表示します。
- step:6: Grasshopper でモデルを変更。=>step2 に戻る。 といった流れになります。
step4 の Draco 圧縮は Node.js を使って行ってますが、food4Rhino の以下のアドオンを使用すれば step2 で fbx で出力せず、そのまま Draco 圧縮をかけたモデルを出力できます。
しかし、非推奨になってしまっていたので今回は使用しませんでした。(いちおまだ使うことはできるようです。)
Step1 : Grasshopper でモデル作成 (モデル作成)

上記が Grasshopper のプログラム全体像になってます。
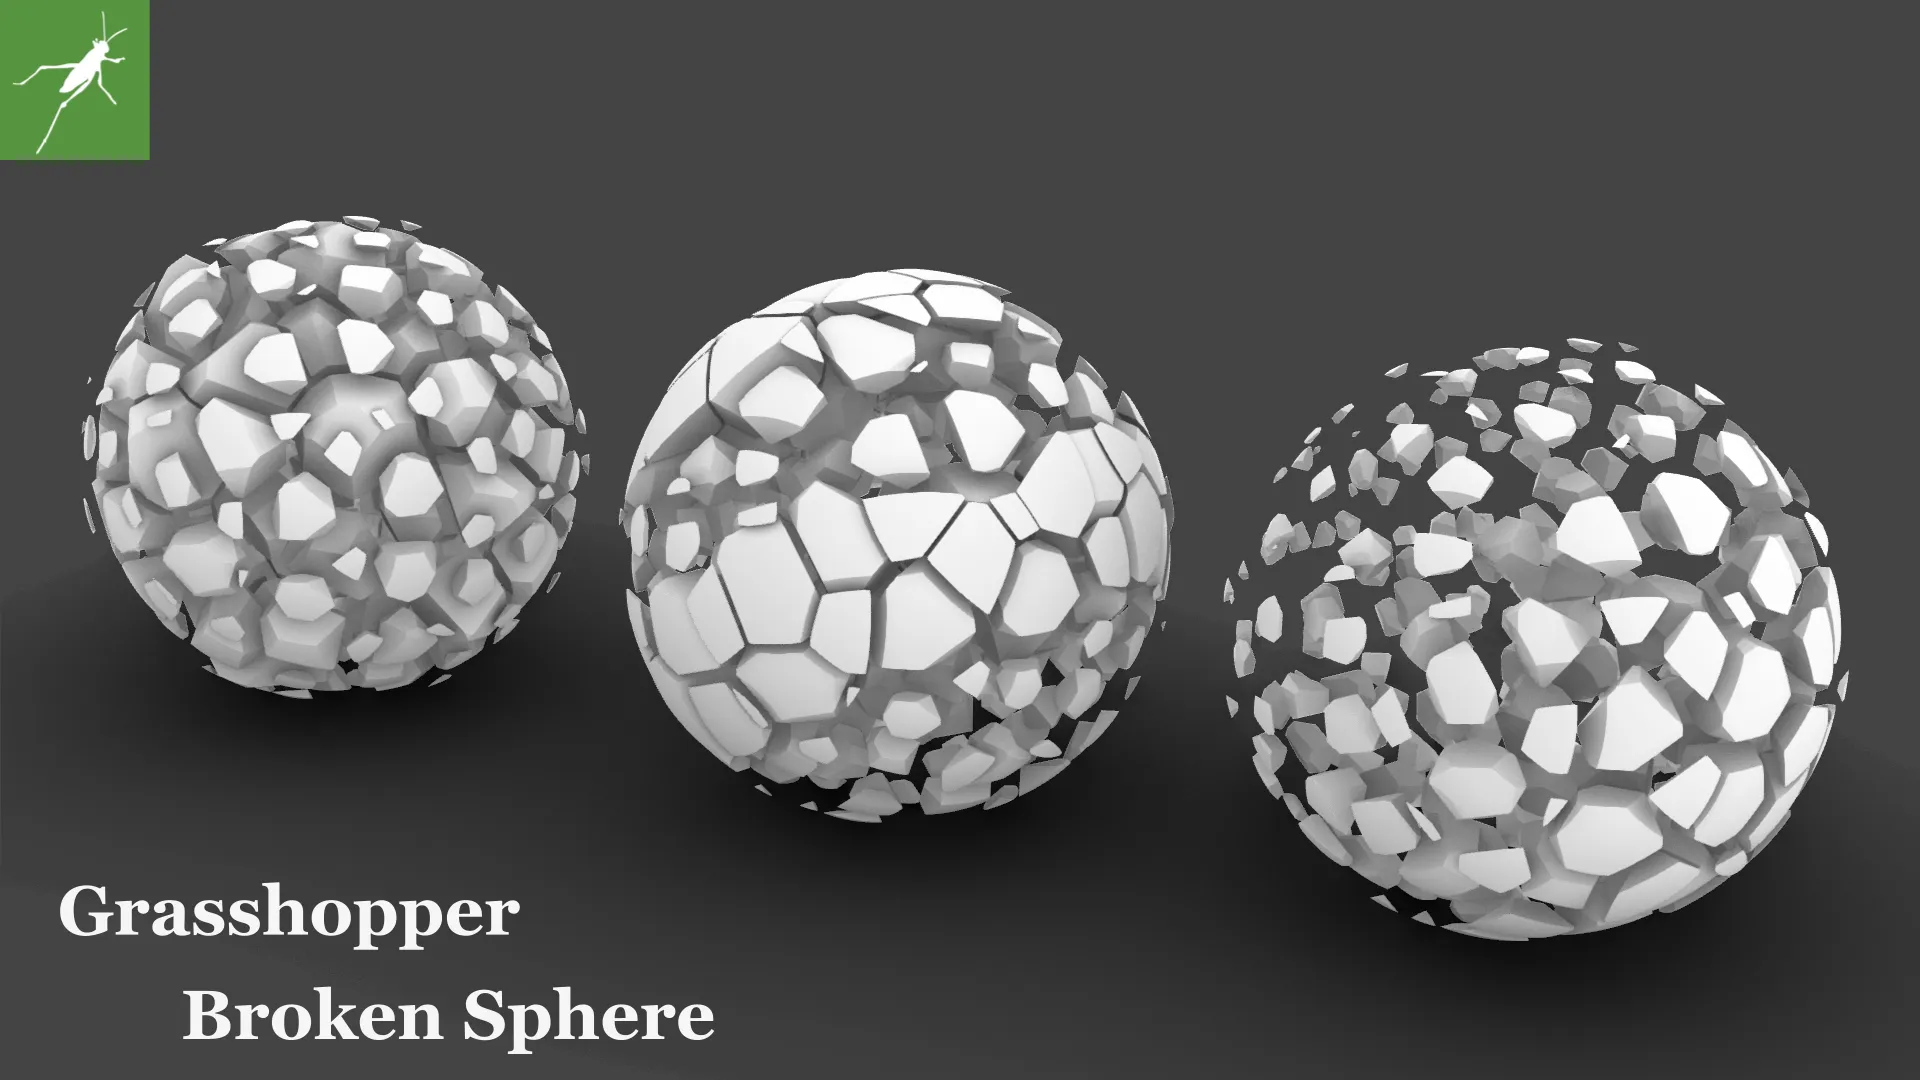
3グループに分かれてますが 1 グループ目はモデルを生成してます。ここは何でもよくて最終的に Brep で出力されてれば OK です。それぞれお好きなモデルで実装してみてください。私は以前記事で書いた以下のモデルを使用します。
Step1 : Grasshopper でモデル作成 (Mesh 化して色付け)

- 作成したモデル(Brep)を Flatten して Mesh コンポーネントに接続して Mesh 化します
- Mesh Join で1つの Mesh にまとめます。
- Mesh に色情報を持たせます。Deconstruct Mesh で頂点を取得、Deconstruct で頂点を xyz 成分に分けます。
- Remap コンポーネントと Bounds コンポーネントを使用して、xyz 成分それぞれを 0 ~ 1 に Remap します。
- Colour RGB(f)コンポーネントに Remap した値を RGB に接続します。
- Mesh Colour コンポーネントに接続して Mesh の頂点に色情報を持たせて完了です。私の場合は以下のようなモデルが出来上がりました。

step2: ghpython コンポーネントを使用してモデルを Export

作成した Mesh を fbx 形式で Export していきます。プラグイン
を使用しています、インストールしてない方はインストールお願いします。
- Elefront の Bake Objects コンポーネントを使用して作成した Mesh を Bake していきます。この時、BakeName に Bake するオブジェクトの名前を設定してください。今回は「baked_mesh」としてます。これを設定することで、モデルを変更して再度 Bake した際に変更前のモデルを削除してから Bake してくれます。
- ElefrontAttributes コンポーネントを使用して Bake 先の Layer を指定します。今回は「default」という名前のレイヤに Bake していきます。
- これで Elefront の Bake Objects コンポーネントの Bake ボタンを押すと作成したモデルが Rhinoceros に「baked_mesh」という名前で「default」レイヤに Bake されます。
- Ghpython コンポーネントを用意し、Bake Objects コンポーネントの出力端子 G を baked という変数名で、layer_name という変数名でレイヤ名「default」を受け取ります。
- Bake Objects コンポーネントは Bake すると、出力端子 G から Bake したモデルの Guid を返します。この値が返ってきら python が実行するようにコードを書いていきます。
1import rhinoscriptsyntax as rs 2import Rhino 3import scriptcontext as sc 4sc.doc = Rhino.RhinoDoc.ActiveDoc 5 6output_folder = "C:\\Users\\81803\\Desktop\\outpuFolder\\" 7obj_name = "voronoiSphere" 8object_file_name = "{}.fbx".format(obj_name) 9file_path = output_folder + object_file_name 10 11if baked != None: 12 ids = rs.ObjectsByLayer(layer_name) 13 selected_objects = rs.SelectObjects(ids) 14 rs.Command("_-SaveAs {} _Enter".format(file_path)) 15 rs.UnselectAllObjects() 16 finish_export = "finish"
- 上記が python のコードになります。1 ~ 3 行目で必要なモジュールをインポートし、4行目で Rhino 上のオブジェクトを扱えるようにします。
- 6 行目で output 先フォルダの path を指定してます。
- 7 行目で保存するオブジェクトの名前を決めてます。
- 8行目で保存するデータ形式を指定してます。今回は.fbx で出力します。 (※上記だと object_file_name = voronoiSphere.fbx となります)
- 9 行目で保存後のファイルの path を指定してます。(※上記だと file_path ="C:\Users\81803\Desktop\outpuFolder\voronoiSphere.fbx となります)
- 11 行目以降がファイルを Export するプログラムになります。Bake Objects コンポーネントの Bake ボタンを押すと変数 baked に値がわたってきてプログラムが実行されます。
- 12 行目で Rhinoceros の default レイヤ内のオブジェクトの id を取得し、12 行目で受け取った id のオブジェクトを Rhinoceros 上で選択します。
- 13 行目で Rhinoceros の SaveAs コマンドを実行し、指定したフォルダーに fbx 形式で保存されます。
- 14 行目で選択したオブジェクトを解除し、15 行目で export が終わったことを出力します。
Step3,Step4 :モデルの圧縮 (Node.js で API 作成)
Node.js を使用して先ほど出力した fbx 形式のモデルを Draco 圧縮していきます。
モデルの容量が大きくない場合は圧縮する必要はないかもしれませんが、ある程度容量が大きくなるとブラウザでのロード時間が長くなってしまいます。
ある程度容量の大きなモデルを想定して圧縮処理を加えていきます。今回は Node.js を使用して圧縮をかけていきますが、Node.js 自体の解説は詳しくしていきません。ご自身のお得意な言語で実装して見てください。
また冒頭でも述べましたが、より簡単な方法は
のアドオンを使用すると Rhinoceros 上で Draco 圧縮されたファイルを Export できるので、事前に Draco 圧縮する設定をしておき、step2 で.fbx で出力するところを.gltf で出力すればこの Node.js を使用せずとも Draco 圧縮できます。まだダウンロードできますが、DEPRECATED になっているのでご注意ください。
以下が Node.js で作成した圧縮処理になります、フレームワークは Express を使用してます。すべてのコードを確認したい方は
をのぞいてみてください。
1import { Router } from "express";
2import fsExtra from "fs-extra";
3const convert = require("fbx2gltf");
4const compress = require("gltf-pipeline");
5
6const router = Router();
7
8router.post("/", async (req, res) => {
9  const { path, fileName }: { path: string, fileName: string } = req.body;
10
11  //fbx => glb
12  const inputPath = path + fileName + ".fbx";
13  const outputPath = `${path + fileName}.glb`;
14  await convert(inputPath, outputPath);
15
16  // gltfPipeline glb => gltf
17  const inputGlbFilePath = outputPath;
18  const outputGlbFilePath = `${path + fileName}_converted.gltf`;
19  const glbToGltf = compress.glbToGltf;
20  const glb = fsExtra.readFileSync(inputGlbFilePath);
21  await glbToGltf(glb).then(function (results: any) {
22    fsExtra.writeJsonSync(outputGlbFilePath, results.gltf);
23  });
24
25  // gltfPipeline gltf => draco_compress
26  const processGltf = compress.processGltf;
27  const inputCompressFilePath = outputGlbFilePath;
28  const compressFilePath = `\\outputのpath\\${fileName}_compress.gltf`;
29
30  const gltf = fsExtra.readJsonSync(inputCompressFilePath);
31  const options = {
32    dracoOptions: {
33      compressionLevel: 10,
34    },
35  };
36
37  await processGltf(gltf, options).then(function (results: any) {
38    fsExtra.writeJsonSync(compressFilePath, results.gltf);
39  });
40
41  res.status(200).json("compression_finished");
42});
43
44export default router;
- POST メソッドで作成してます。エンドポイントは "http://localhost:3001/api/compression" になるように設定してます。github リポジトリ要確認 => github
- Ghpython からリクエストを送る想定をしています。保存した.fbx の file の path と fileName を受け取ります。
- 最初にfbx2gltfを使用して fbx =>glb に変換します。変換の完了を待ってから次の処理に進んでほしいので await してます。
- 次にgltfPipelineを使用して glb=>gltf 形式に変換します。こちらの変換の完了を待ってから次の処理に進んでほしいので同様に await します。
- その後、gltfPipelineを使用して Draco 圧縮をかけてます、こちらも完了を待ちたいので await します。output 先は後程立ち上げる Threejs プロジェクトのフォルダを指定してます。Draco 圧縮が完了後"compression_finished"をレスポンスで返します。(※本当は glb から一発で Draco 圧縮かけたかったのですが、うまくいかず・・・一手間多くかかっております)
これで Draco 圧縮するための API 完成です。
ちなみに今回のモデルを圧縮すると、以下のようになります。もともと 1.58Mb なので圧縮する必要ないのですが、1.58Mb => 338kb まで圧縮できました。

Step3,Step4 :モデルの圧縮 (Ghpython からリクエストを送る)
前項で作成したエンドポイントに対して、Ghpython からリクエストを送ります。github リポジトリは
先ほど作成した Ghpython コンポーネントに追記していきます。
1import urllib2
2import json
3import rhinoscriptsyntax as rs
4import Rhino
5import scriptcontext as sc
6sc.doc = Rhino.RhinoDoc.ActiveDoc
7
8output_folder = "C:\\Users\\81803\\Desktop\\outputFolder\\"
9obj_name = "voronoiSphere"
10object_file_name = "{}.fbx".format(obj_name)
11file_path = output_folder + object_file_name
12
13def compression():
14    url = 'http://localhost:3001/api/compression'
15    sendValues = {
16      'path':output_folder,
17      'fileName':obj_name
18    }
19
20    sendValuesJson = json.dumps(sendValues).encode("utf8")
21    request = urllib2.Request(url,sendValuesJson)
22    request.add_header("Content-Type",'application/json')
23    request.get_method = lambda: 'POST'
24    response = json.load(urllib2.urlopen(request))
25    print response
26
27if baked != None:
28    ids = rs.ObjectsByLayer(layer_name)
29    selected_objects = rs.SelectObjects(ids)
30    rs.Command("_-SaveAs {} _Enter _Enter".format(file_path))
31    rs.UnselectAllObjects()
32    compression()
33    finish_export = "finish"
- 13 行目から compression 関数を定義しています。変数 url が作成したエンドポイントで、sendValues が送信するデータになります。path と fileName に fbx ファイルのアウトプットフォルダの path と file 名を渡してます。
- その後 sendValues を JSON 化して 21 行目にリクエストの body にセットしてます。
- 22 行目で body の形式を JSON で指定し、23 行目でリクエストを送信する際のメソッドを POST で指定してます。
- 24 行目でリクエストを送信し、JSON 形式でレスポンスが返ってくるように API を記述したので返ってきた JSON 形式の値をパースしてます。
- 25 行目でレスポンスを print してます。"compression_finished"が返ってくるはずです。
- 32 行目で compression 関数を実行してます。これで、Bake Objects コンポーネントの Bake ボタンを押すと => baked に値が入って Ghpython コンポーネントの処理が走る=>.fbx で出力=>.gltf(圧縮済み)で出力=>"compression_finished"が出力される。といった処理が完成しました。
step5:Three.js を使用して Draco 圧縮をかけたモデルを表示

プロジェクトを立ち上げて Draco 圧縮したモデルを表示していきます。今回は React プロジェクトを立ち上げて、Three.js も React Three Fiber を使用しています。詳しい方法は過去の記事で解説してますので以下を参照してください。
プログラムの一部を解説していきます。プログラム全体は
参照願います。
1import "./App.css";
2import * as THREE from "three";
3import { Canvas } from "@react-three/fiber";
4import { OrbitControls, Stage, useGLTF } from "@react-three/drei";
5
6const material = new THREE.MeshStandardMaterial({
7  vertexColors: true,
8});
9
10function App() {
11  const modelPath = "/model/voronoiSphere_compress.gltf";
12  const gltf2 = useGLTF(modelPath);
13  gltf2.scene.traverse((child) => {
14    if (child instanceof THREE.Mesh) {
15      child.material = material;
16    }
17  });
18
19  return (
20    <>
21      <Canvas
22        style={{ width: "100vw", height: "100vh", background: "#333" }}
23        camera={{
24          fov: 75,
25          near: 0.1,
26          far: 20000,
27          position: [0, 20, 30],
28        }}
29      >
30        <OrbitControls makeDefault />
31        <directionalLight intensity={1.15} />
32        <axesHelper scale={200} />
33        <Stage intensity={0.02} environment={"city"} adjustCamera={true}>
34          <primitive object={gltf2.scene} />
35        </Stage>
36      </Canvas>
37    </>
38  );
39}
40
41export default App;
- 12 行目の model の path は react プロジェクトの public フォルダ内を指定してます。public/model/voronoiSphere_compress.gltf になります。Node.js で API を作成した際はここに保存されるように指定をしてました。
- 13 行目で model をロードして 35 行目で Scene に追加してます。
- 7 ~ 9 行目でマテリアルを作成してます。今回は頂点の色情報を出力しており、それを使用するので VertexColors を true にします。14 ~ 18 行目でロードしたモデルのメッシュに対してマテリアルを指定してます。
- 32,34 行目で光源などの環境設定を行い、33 行目で xyz 軸を表示してます。
これで完了です。
step:6: Grasshopper でモデルを変更

上の gif が実際に動かした際の様子になります。
- Grasshopper でモデルを変更 => Bake ボタンを押す => Ghpython が走り fbx での出力と圧縮が実行 => Three.js に反映される といった流れになります。 保存先をクラウドにしてプロジェクトをデプロイしていれば、チームで共有するなども可能になるかと思います。
以上
【参考】

